My Polaroid 110 Conversion
For those not so deep into film camera lore, there is a set of polaroid camera models: The 110 A, 110 B, & 120, that are famous for being converted to different formats. The film they initially used is now all 50 years expired and is certainly never coming back. For decades now, companies and individuals have been converting them to either:
newer instant film formats: First peel apart and now Instax Wide or polaroid 600.
and
4x5 film with graflock or bailback mounts.
The latter of the two was the more interesting for me. The reason there is such high interest to convert these cameras is three-fold: It’s cool; they have off the shelf 4x5 lenses that are sharp and boast a surprisingly fast aperture of 4.7; they were built with a coupled rangefinder system that means you can shoot them handheld.
Sadly, until last year I was short two things for this project:
A camera :( and a conversion kit.
A fortunately cheap listing in an auction website would come to change the first variable, and after having it sit on my shelf for the better part of 6 months, I finally started looking into the second one. Existing projects and conversion kits came in many flavours, all inadequate for what I wanted.
There are amazing, pre-built cameras online, some of them made new, most of them made by professional companies 20 years ago for photographer that thought this was as cool as I did and were willing to shell out the big bucks for a full conversion. Sadly, you can only find these on eBay for north of 1200€ right now, and my pockets are not nearly as deep as my aspirations.
There were also 3D printed graflok only conversions, and though they work for some, I wanted a ground glass to use with a tripod, should I want to do that. They also looked cheaply made and janky.
Morten Kolve, camera-maker-extrordinaire, responsible for many fully open source, amazing projects, had designed a conversion that looked interesting, but sadly, it did not have full coverage. He said in his blog and thingiverse that he felt the trade-off for making the camera smaller and lighter was worth it. I did (and do) not concur. Starved for options, armed with a 3D printer at work and having just finished the last season of a show I was binging, I got to work trying to design my own conversion.
One thing was obvious. I was underprepared in terms modelling skills, and I knew that going in, but I will spoil it now: I’m writing this one year later and I tell people I am a camera maker now, I own my own 3D printer, all because of this project.
Still, before I give you the goods, I’ll take you through the main challenges of building the camera:
Disassembling the camera was mostly straight forward. There were two pins that needed to be pushed off their hinges, which wasn’t too bad.
After that, I had to decide on mounting points for the back and print a plate shaped to match the camera as a way to test mounting and dimensions.
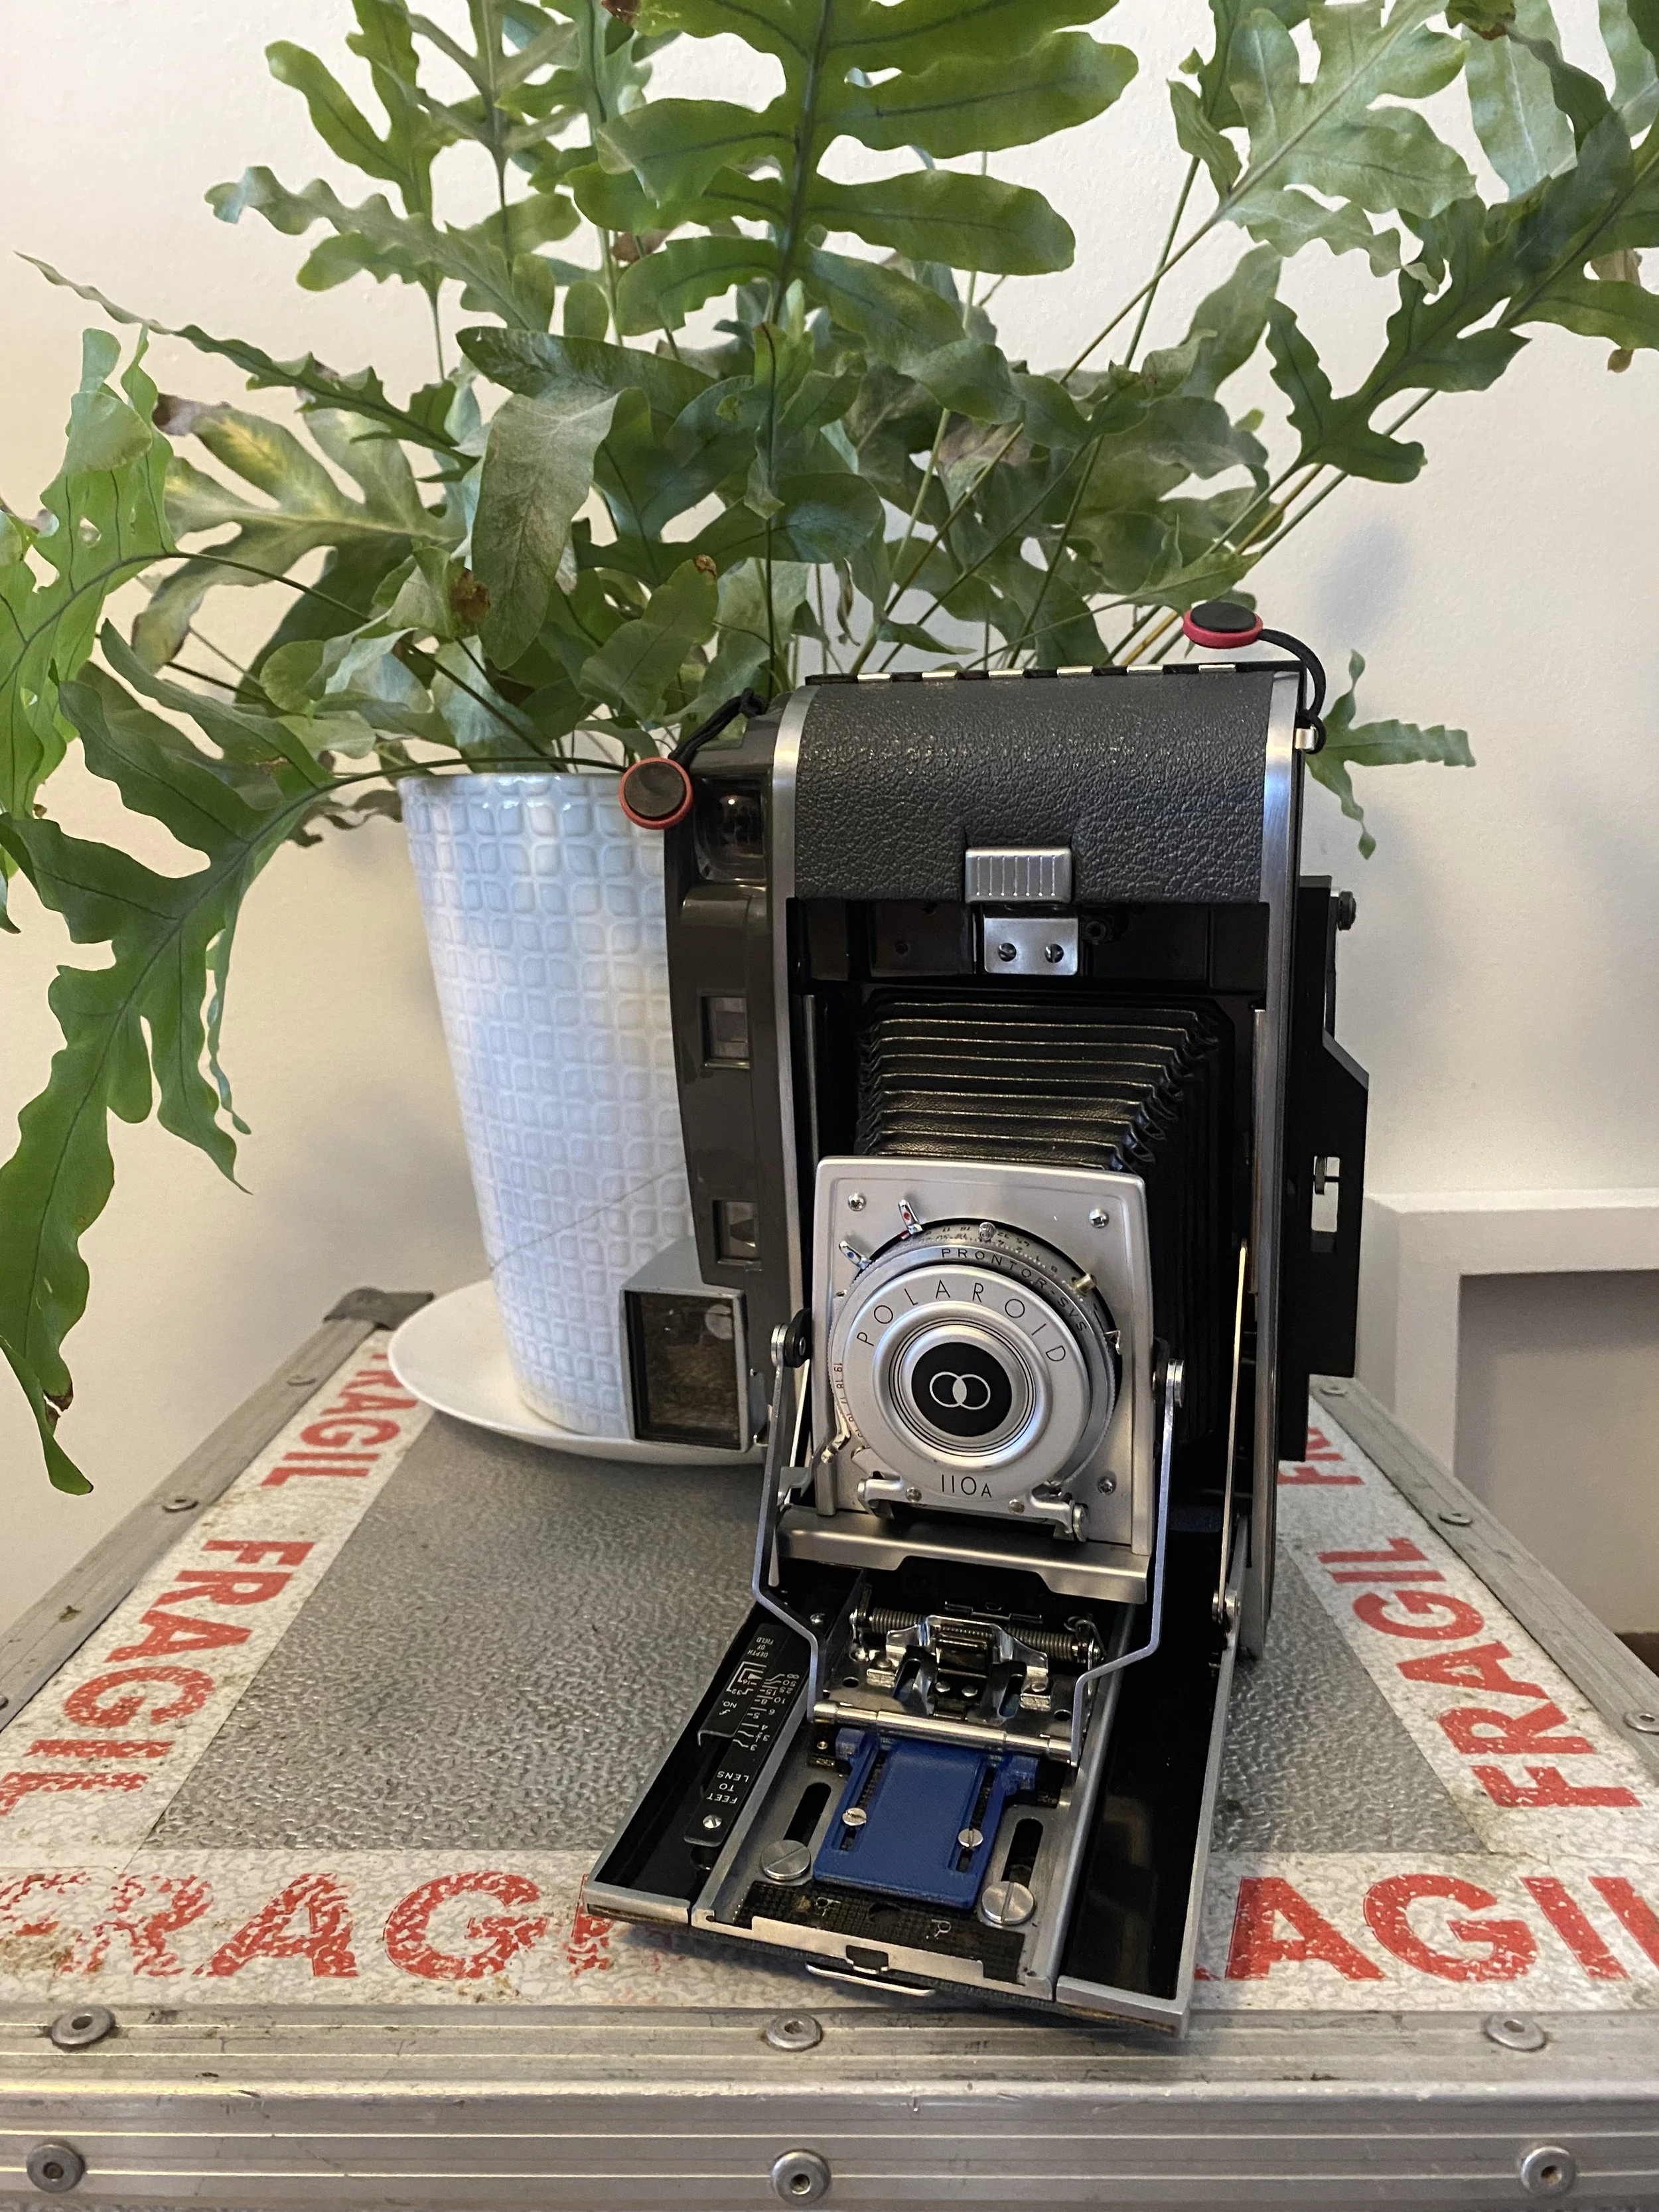
Once that was sorted, I contoured the shape of the top plastic piece, to push the back of the camera far enough to mount a 4x5 base to it. Here is where it is probably useful to share that this camera mod was made to mate with cambo spring backs. They are well built and come standard with most combo 4x5 monorails, usually so undesirable people struggle to give them away. Best of all, they are dead simple to remove and are hot-swap, only requiring to hinge attachments to clip onto, one one either side. I later found out that it is very similar to Sinar and Linhof spring backs, and at least with Sinar it also works though the fit is not as nice.
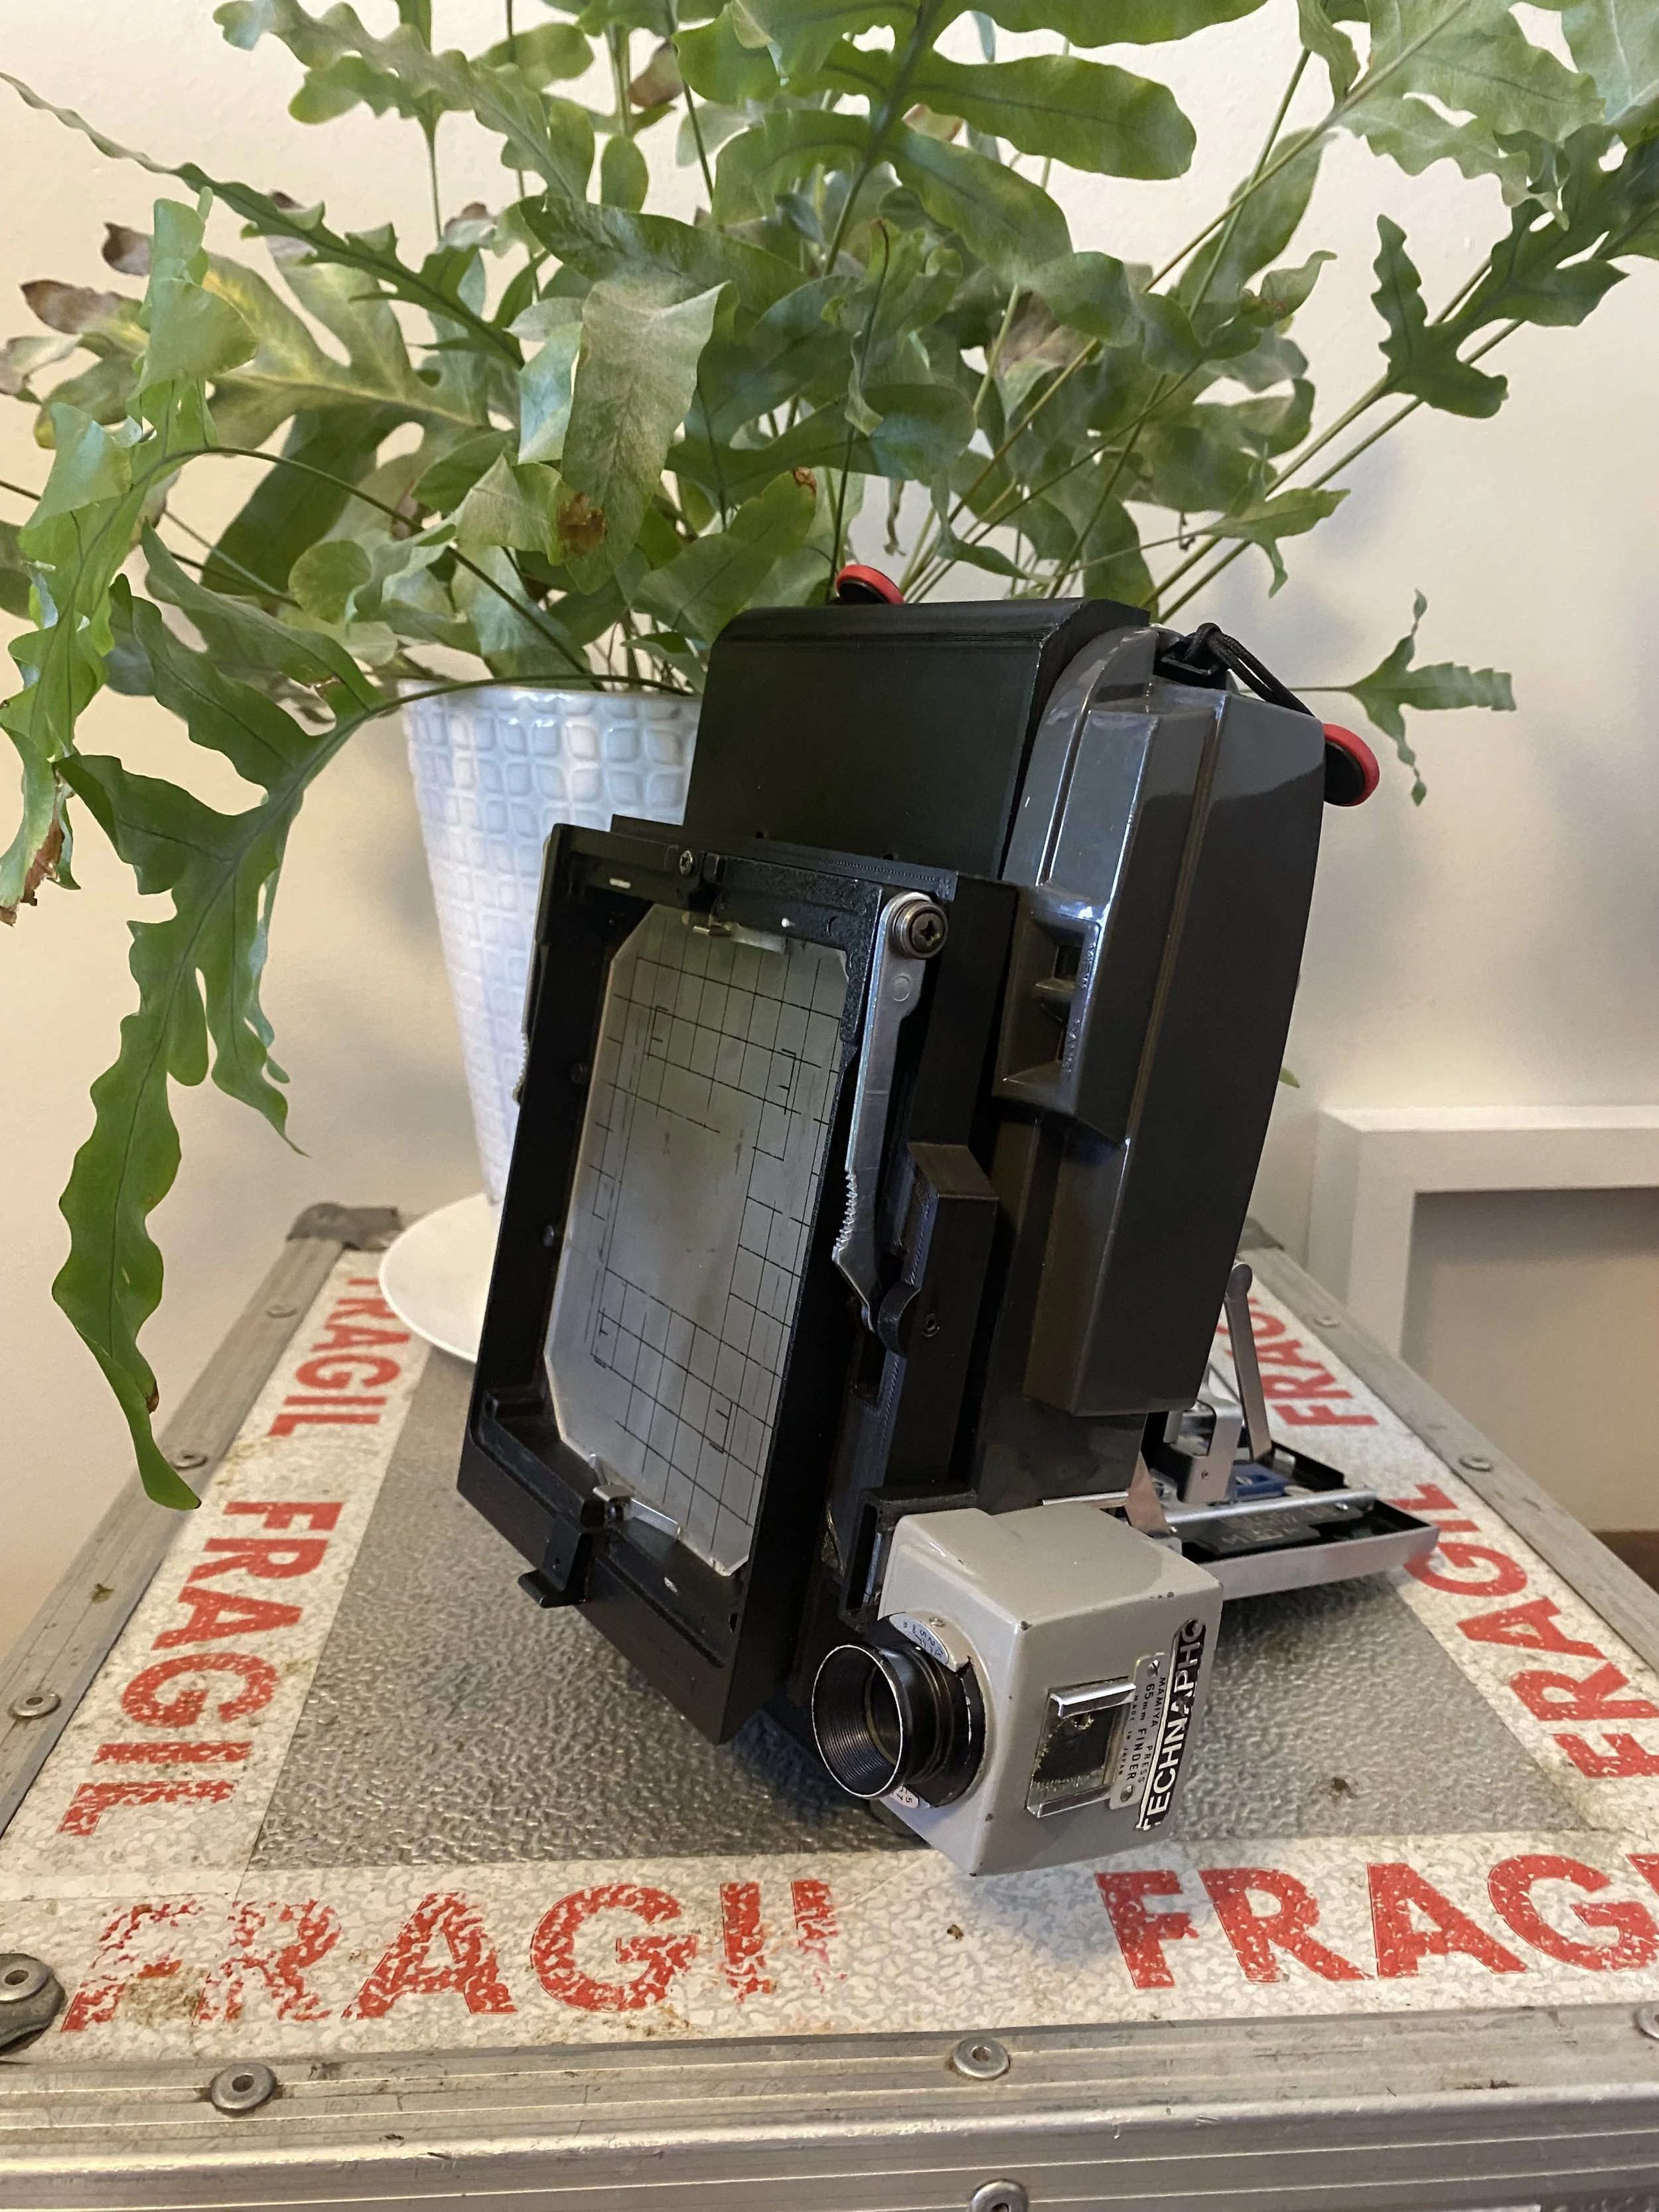
Ground glass on the camera
After dealing with some problems concerning misaligned rangefinders and stuck shutters, I was able to have use the camera. Last things that had to be done were calibrating the infinity stop and fashioning a viewfinder.
I made an infinity stop similar to many others on the internet, and after drilling 2 rivets on the rail, I was able to use the remaining screws to tighten the infinity stop in place so the lens would focus at infinity.

Infinite Stop in blue